Customizing Opacity and Color of Elementor Form Placeholders

How to Adjust Placeholder Opacity and Color in Elementor Form Fields

The Issue

By default, Elementor form placeholders are displayed at half opacity, which can make them hard to read.

The Solution

To adjust the opacity and color of all placeholder text in Elementor forms, add the following CSS code to one of the following locations:

  • The CSS area of your active WordPress Theme
  • Your Child Theme’s CSS section
  • The direct CSS section within the Elementor page you’re working on
  • Appearance -> Customize
input::placeholder, textarea::placeholder {
    color: #000!important;
    opacity: 1 !important;
}

Create a Smooth Infinite Loop Image Carousel with Elementor Pro

Learn how to create a super smooth, infinitely looping Image Carousel using Elementor Pro and a tiny bit of custom css! Use it to show case client logos, your own work or any other type of image you want to slide across the screen.

The special settings we need to set is Additional Options

Turn on only :

Autoplay

Infinite loop

Animation Speed : 5000

Autoplay Speed : 0

like this

On the advanced settings give the element css name: infinite_slider

like this

and add to the custom css

this custom css

.infinite_slider .swiper-wrapper{
-webkit-transition-timing-function: linear !important;
transition-timing-function: linear !important;
}

here is general settings for the Image Carousel

Remove Postcode/ZIP Field from checkout page

most of my client s request to remove the postcode/zip filed from the checkout page in woocommerce this is the code you need to add to your child theme functions.php file

add_filter( 'woocommerce_checkout_fields' , 'razztech_remove_billing_postcode_checkout' );
 
function razztech_remove_billing_postcode_checkout( $fields ) {
  unset($fields['billing']['billing_postcode']);
  return $fields;
}

Changing order of elements in mobile header

Lot of times designer want to change order of elements in header different from the desktop version in order to do that they usually make new header and is bad for seo and for handling the site header instead of that we can do it with simple css code

1- first we give each column a class name like this

2- after u finish naming which is usually logo , menu , button ,social we add css code to custom css here

the code that we need to add is like this

@media only screen and (max-width: 600px) {
  .logo{ order:1;  }
  .menu{ order:3;  }
  .social{ order:1;  }
}

the number after order is by the order you want each element to be shown

you can add as much u want of columns

How To Fix Horizontal Scrollbar on Mobile When Using Elementor?

Fix Overflow Issue By Adding CSS Code

There are two cases in which this method would help you more than using the Elementor options:

  • You need to keep the overflow on the top and bottom of the section while hiding it on the sides to avoid horizontal scroll;
  • You have too many elements with the overflow issue, and you need a solution that would apply to your whole website.

Please follow these steps to remove overflow using a custom code:

Step 1 – Navigate to Appearance > Customize > Additional CSS;

Step 2 – Add the following CSS code:

html,
body{
  width:100%;
  overflow-x:hidden;
}

Step 3 – Click “Publish” to save changes.

How to Add a File Size Column in the WordPress Media Library Admin Screen

o add a file size column to the WordPress Media Library, you will need to add a few lines of code to your WordPress theme’s functions.php file. Before you make any changes to your functions.php file, it’s always a good idea to make a backup copy of the file.

To get started, open your functions.php file and add the following code:

// Add a column for file size in the Media Library table
function custom_media_column_file_size( $columns ) {
    $columns['file_size'] = __( 'File Size', 'custom-media-columns' );
    return $columns;
}
add_filter( 'manage_media_columns', 'custom_media_column_file_size' );
// Display the file size in the Media Library table
function custom_media_column_file_size_data( $column_name, $attachment_id ) {
    if ( 'file_size' == $column_name ) {
        $bytes = filesize( get_attached_file( $attachment_id ) );
        echo size_format( $bytes, 2 );
    }
}
add_action( 'manage_media_custom_column', 'custom_media_column_file_size_data', 10, 2 );

Automatically Delete Woocommerce Images After Deleting a Product

Implement The Code Inside Your Child Theme

open your child-theme functions.php and paste the below code

// Automatically Delete Woocommerce Images After Deleting a Product
add_action( 'before_delete_post', 'delete_product_images', 10, 1 );

function delete_product_images( $post_id )
{
    $product = wc_get_product( $post_id );

    if ( !$product ) {
        return;
    }

    $featured_image_id = $product->get_image_id();
    $image_galleries_id = $product->get_gallery_image_ids();

    if( !empty( $featured_image_id ) ) {
        wp_delete_post( $featured_image_id );
    }

    if( !empty( $image_galleries_id ) ) {
        foreach( $image_galleries_id as $single_image_id ) {
            wp_delete_post( $single_image_id );
        }
    }
}

Order product collections by stock status, instock products first

  1. This code snippet functions exclusively with the “Default Sorting” option found in WordPress > Customize > WooCommerce > Product Catalog > Default product sorting section. It does not override sorting by price, popularity, or any other criteria set as default.
  2. The snippet sorts products based on their “stock_status” in ascending order (“ASC”). The acceptable values for “stock_status” are “instock,” “outofstock,” and “onbackorder.” Consequently, products will be displayed alphabetically as follows: 1. instock, 2. onbackorder, 3. outofstock.
  3. For this snippet to work effectively, all your products must be utilizing the “Managing Stock” feature in the product edit page under Product Data > Inventory. Otherwise, the behavior of the snippet with products lacking this option is uncertain.

please add this code in the functions.php file in your child theme

add_filter( 'woocommerce_get_catalog_ordering_args', 'bbloomer_first_sort_by_stock_amount', 9999 );

functionbbloomer_first_sort_by_stock_amount( $args) {

   $args['orderby'] = 'meta_value';

   $args['meta_key'] = '_stock_status';

   return$args;

}

How to Update WordPress Automatically Without Using FTP

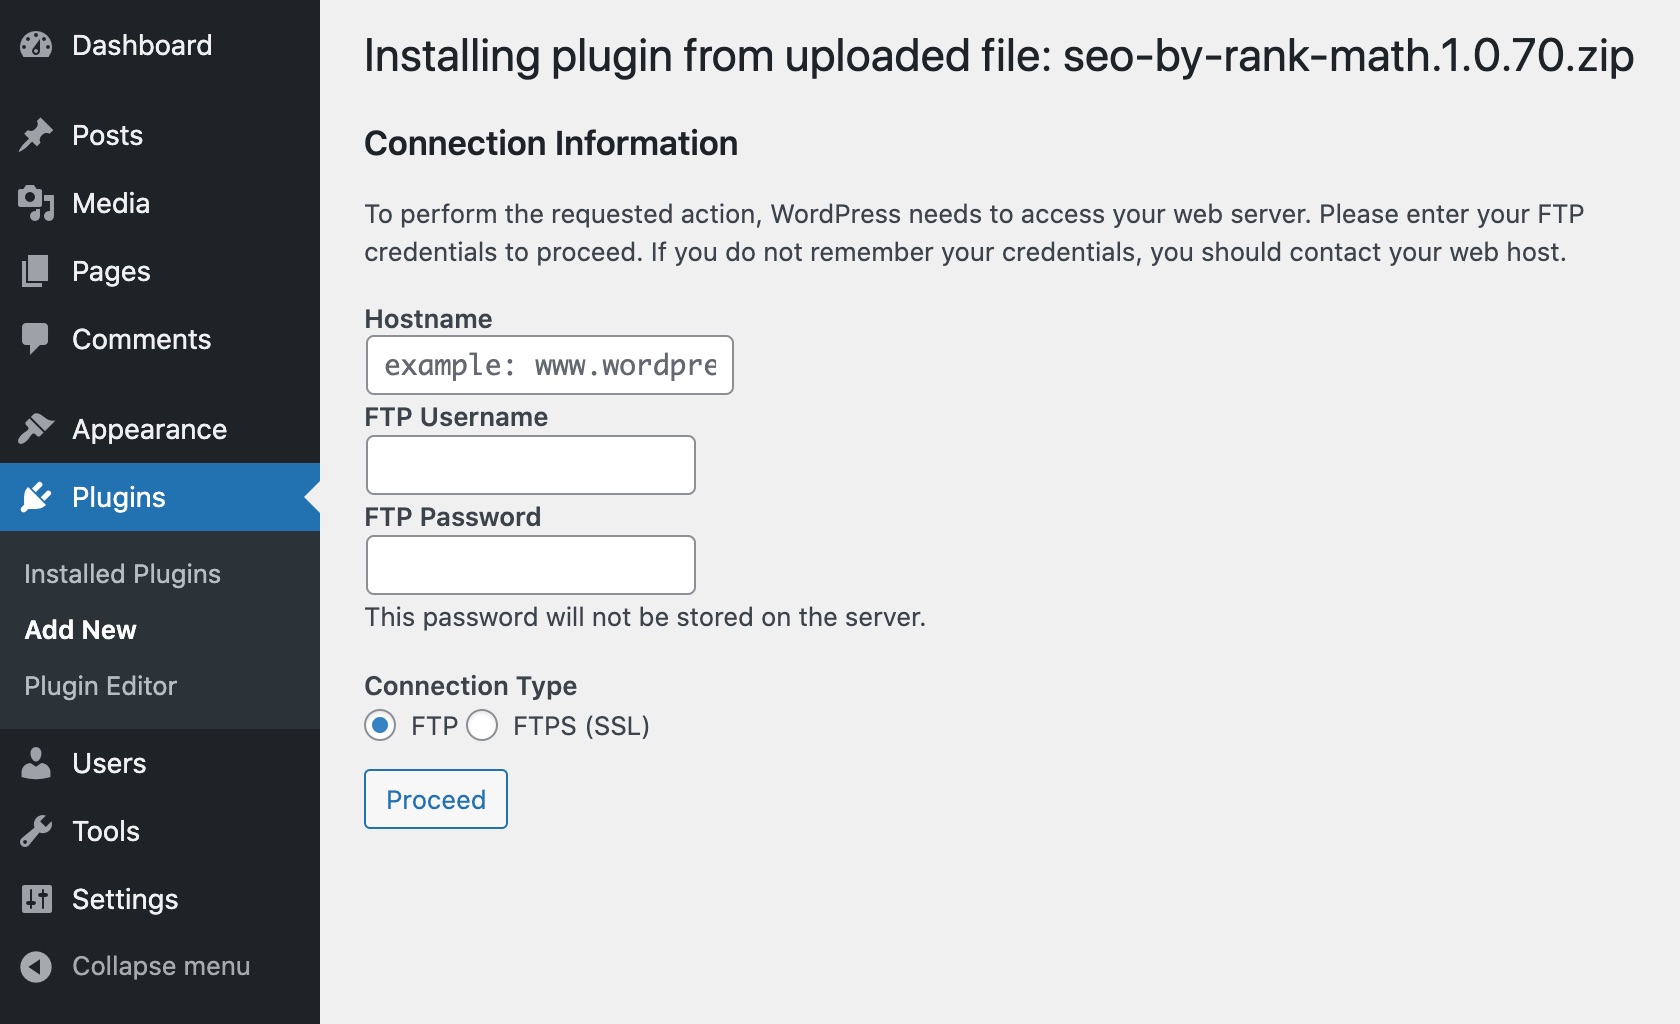
If you’re seeing the following prompt from WordPress requesting your FTP credentials while trying to install, update or rollback Rank Math, then it is because your website is configured to use a filesystem that prevents modifying files directly from your WordPress Dashboard.

what u need to do is simple jsut add this code

define( 'FS_METHOD', 'direct' );

in the wp-config.php just above the line

/* That’s all, stop editing! Happy blogging. */